Is GraphQL a tool that will make your life better or worse?
TL;DR: as with any technology it depends on your situation and needs. There are real benefits for developer experience and solving many related problems with a cohesive architecture, but it’s not just a simple drop-in replacement for REST, HATEOAS or {g,t}RPC. GraphQL is better for serious projects with interactive user interfaces and a rich relational data model. If you are willing to adopt a new paradigm and use it as a foundation for a new application, it can be worthwhile and make your life moderately easier.
I’ll summarize the tradeoffs here and go into more detail with examples and explanations afterwards.
Pros:
- Can obviate the need for a web framework or server entirely
- End-to-end type safety
- Great for language-agnostic APIs (vs. something like tRPC) and code generation
- Presents a unified client interface that can weave together independent services or functions on the backend
- Implement simple handlers without even talking to your application backend
- Add (simple) declarative access controls
- Smart caching
- Real-time push events (WebSockets) are solved for you
- Documentation generation for free (like OpenAPI but better)
- Client has more control over what data is fetched retrieved
- Designed for data structured as a graph (obviously) or hierarchical/relational data
- Fetch all the data the application needs in a single request (great for mobile apps)
- Can segregate your application services into independent units to get the benefits of a microservice architecture without the overhead and complexity
Cons:
- Requires some specialized tools to work with compared to REST
- Not as universally understood and adopted as REST
- Can be more strict than necessary for your project
- Requires some sort of extra schema definition step to add a new “endpoint”
- Not necessarily suitable for public/unauthenticated APIs
- May involve code generation, an extra build step
- Unusual HTTP semantics
- All requests are to the same endpoint
- All responses are 200 OK
- Everything is a POST
- No support for untyped/unstructured fields, just “string”
Caveats
I’m writing based on my experience with particular implementations of GraphQL servers and clients. My setup has been AWS AppSync, graphql-code-generator, TypeScript, React, and Apollo Client. Some of my opinions are relevant to this setup and some are broadly applicable. I think AWS and React are common enough technologies that it’s worth looking more at some concrete implementation details there.
Other Opinions
GraphQL was designed and created by Facebook, a company that seems to make a lot of money and build performant software and complex user interfaces that work across a variety of platforms. They are also behind React and are worth taking seriously when it comes to web technologies, even if they were originally cursed with PHP and MySQL.
Anecdotally I’ve seen some articles and videos across the transom bagging on GraphQL. I recently listened to a terrific interview on the Changelog podcast diving deep into API design, and the design of hypermedia and HATEOAS which I highly recommend. There was some very light and admitted highly subjective criticism of GraphQL on it but they are keeping an open mind. I hope to fill some open minds with my arguments for and against GraphQL, which is the best you can do with any technology other than say “it depends.” The episode and transcript can be found here:
Changelog & Friends 24: HATEOAS corpus – Listen on Changelog.com
Amazon has some arguments for GraphQL over REST as well.
What is GraphQL?
GraphQL is an attempt to add another layer of abstraction and standardization on top of traditional HTTP-based APIs. There’s nothing amazingly groundbreaking about it, but it provides for a standard architecture that enforces many practices that can be beneficial for people building moderately serious apps. You must define a schema for the types of requests your clients can make, what fields appear in the request and response bodies, what changes can be subscribed to (think WebSockets), and extensions that can be implemented by the gateway (think permissions or @deprecated).
This schema can be derived from code or written before code. It contains enough information to generate types so your clients and servers know exactly what will be in a given request, which is also enabled by the validation that will be automatically performed to ensure all requests and responses strictly conform to the declared schema. So as far as checking types of data or getting only the fields you explicitly allow in a request, that is one less thing to worry about on the server side and is a more secure default than REST APIs which allow the client to send any sort of data and fields it pleases with a request. The schema also enables documentation, client generation, a fully discoverable API, and a playground for testing requests. Very similar to what you get if you use OpenAPI (aka Swagger) generation tools with REST APIs, but in my opinion it’s much smoother and pleasant compared with OpenAPI. When you define an operation (equivalent of an endpoint), it must be a query, mutation, or subscription. This is very much like HTTP verbs like GET and POST, but more helpfully explicit and strict about the semantics.
The API discovery of fields and operations gives a bit more flexibility in API design and the actual work that must be done to make sure the client can retrieve all the data it needs in a single request. I’m going to borrow the examples from graphql.org here:

name of hero and give me the name of the droid with id 2000.The schema definition and server implementation can make many fields on objects like hero or droid available to be queried, optionally spawning additional requests to fulfill the request. This lets the API designer expose all the data they deem necessary for the client to have at some point without having to define endpoints or parameters to handle every permutation of data fetches and information a client may wish to display in a given interface. It pushes a little more work onto the client side of things but in a very natural way. Let the client decide for a given situation what data it needs, ask the server, which then will issue the appropriate requests to fulfill the request. This may sound a bit like a “backend for frontend” often implemented in microservice architectures. GraphQL is a wonderful replacement for a BFF.
A Replacement for Web Frameworks
This is going to be controversial statement but you can replace your web server, web framework, DTOs (data transfer objects, also called schemas), OpenAPI generation tooling, BFF, and application load balancer with GraphQL. It solves all of these problems for you in an elegant and well-thought-out cohesive architecture. But it is a different paradigm than your typical backend developer is used to.
Boring History
As a certified Old Person building web applications since about 2000, I’ve encountered a good number of web frameworks. Perl, Python, Java, Node, Ruby, they’re all the exact same thing from Catalyst to Flask to Spring to Express to Nest to Rails. In a nutshell they:
- Let you map routes to function handlers
- Define what shape data should be in for requests and responses
- Validate API requests
- Run in some container to service requests
They typically have some other helpful things like ORM integration and middleware but these are trivial to incorporate if desired.
What? How Can I Live Without A Web Framework??
Do I detect a note of panic? Relax. GraphQL handles these things for you. It maps requests to handlers, strictly defines what shape data will be in going in and out of your endpoints, and takes care of the HTTP request handling layer for you. So you can define a schema and then functions which are invoked as needed to service client requests, possibly in parallel or in response to certain fields being requested by the client.
Arguably at the end of the day we have in its end result the same functionality whether we use a web framework or GraphQL, but I believe the bundling of this functionality with the extra thought and care that has gone into making GraphQL a more modern solution is worth serious consideration for new projects. Web application frameworks haven’t changed in twenty years, best practices have evolved since then. In the end you can achieve the same results with CGI scripts or PHP 3, or <form> tags and jQuery, but we know that there have been advancements in tooling and architecture since then.
Maybe I Do Need A Web Framework?
As I started off with, I am absolutely not arguing GraphQL is better in every way or should be used in all situations. There are a great many valid reasons for not choosing to adopt GraphQL for your project. A few off the top of my head:
- Adding a new GraphQL-based service when you already have other APIs (REST or otherwise). GraphQL is a terrific unifier of services but a big ask of teams to adopt incrementally. Managing tooling for two API paradigms sounds like extra suffering. I will point out that you can use a REST API Gateway as a data source for an AppSync GraphQL service though.
- Small projects. Often I am working on projects that are business-critical, involve large relational databases, will be worked on and maintained actively for years. If you want to throw together a small project or a prototype, the extra overhead is not worth it. The payoffs come with larger applications.
- When your frontend and backend are tightly coupled. GraphQL adds an extra layer of abstraction which is extraneous if your backend and frontend are part of the same application. For example if you are using NextJS as both client and server, I would recommend server actions or tRPC.
- Public APIs. If you are building an API which does not require authentication, or is designed to be easy to consume by clients outside your organization, I would advise sticking to something everyone understands and can be easily tested with tools like
CURL. If you want other developers to get up and running and consuming your API with a minimum of extra obstacles, just stick with REST like everyone else.
However if you are embarking on a greenfield, serious project and you expect your API to scale with your organization and provide a high level of strictness and clarity and documentation, GraphQL may be a strong candidate.
Type Safety
I have similar feelings about GraphQL as I do about TypeScript. Sure, people have been building web applications just fine thank you with REST and JavaScript for many years, maybe around 25 at this point which is a lifetime in an engineer’s career. But there comes a point, maybe after another late-night debugging session where you eventually discover some mistyped parameter or property that shouldn’t have existed at runtime is ruining your weekend. Maybe you wonder, why do all these things have to be runtime errors? Maybe the Python heads don’t know there is a better way and think all errors should be runtime errors. I don’t know.
GraphQL and TypeScript ask a bit more of you, the person designing the API or writing the code to implement it. It’s more steps to solve the same problem and you just want to close this ticket. Why waste my time? The answer is that our tools can yell at us before we ship the code, not after. Obviously not in all cases, but many classes of bugs become less likely to happen at runtime, which does save us time and suffering in the long run. They increase maintainability, readability, code completion, AI copilots, and documentationability.
Same reason we write tests. It takes more time to write tests than to not write tests, but it pays off in the long run if we think about the runtime bugs we avoid and the safety we get when refactoring code, and the lower likelihood of someone less familiar with the system breaking other things in a few years time when they try to change something. Again not every software project needs tests, but you know who you are.
GraphQL’s strictness is especially helpful if annoying in the context of an API. A published API is a contract with your clients you must not break. If a client relies on a username field being present in some endpoint, you must keep that field around. If you want to move or rename the field or make it a different type, you risk breaking every old version of your clients which still expect that field to exist with a particular type. GraphQL doesn’t solve the problem by allowing you to just change schemas up on your clients as you like, but it can alert you to the fact you are making a backwards-incompatible schema change and yell at you. This is a very useful CI action to run. For example the graphql-inspector:

Because there’s nothing worse than accidentally pushing an API change that breaks every client. These are the kinds of validations we can leverage with GraphQL.
GraphQL Server
You do of course need some software that performs the duties of a GraphQL API server. There are many very featureful and robust options like Hasura and Apollo, with features like taking your existing Postgres database and generating operations and types, or federation where you can have multiple servers handling different pieces of your graph.
Myself, I always default to using an AWS service if it is good enough to suit my needs. It’s not because AWS has the greatest version of every service you will never need. Reasons why:
- The more infrastructure Amazon runs instead of me, the better.
- It will be more reliable than if I run it myself
- I don’t have to maintain it
- They have great documentation and support and monitoring
- I don’t ever have to think about scaling anything
- AWS services are designed to work with each other. You end up with a cohesive architecture that is more than the sum of its parts.
- Integration with distributed tracing
- Integration with other AWS data sources
- Can run queries on RDS directly
- Can query DynamoDB directly
- Integrated authentication with Cognito
- Pay-as-you-go billing. Great for prototyping on the cheap but being able to scale to handle serious volume without changing anything.
AWS AppSync
So I’ve been using AWS AppSync. It’s a bit oddly named but it’s a serverless GraphQL API. You upload a schema to it, define how users authenticate to it, and then connect operations to resolvers. You can tell it to directly query RDS or DynamoDB, you can write JavaScript resolvers that are executed inside AppSync (this is very cool but also maybe unwieldy to maintain or debug, I would compare it to using stored procedures in your DB instead of application code), and you can use lambda functions to handle requests. It can handle caching and tracing for you.

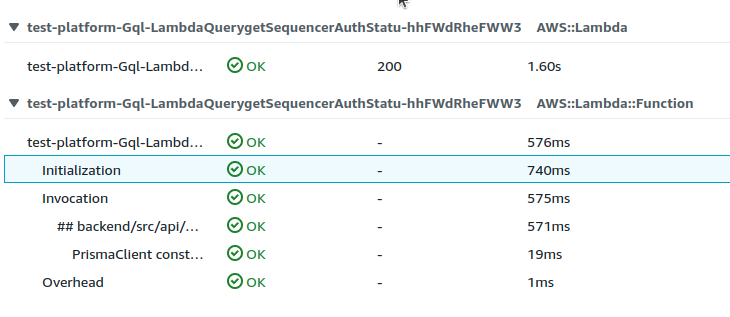
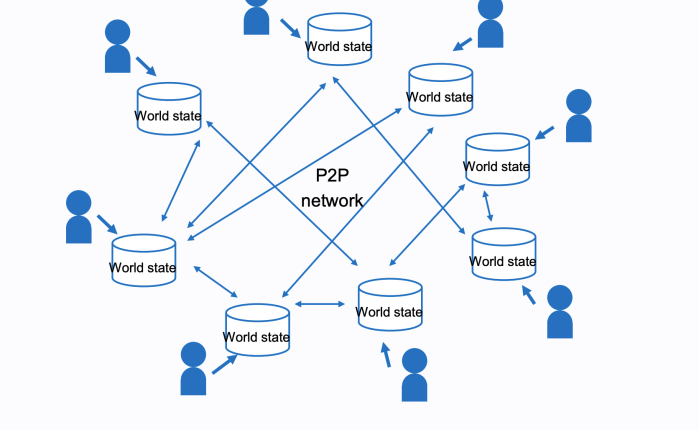
A powerful architecture is to use a serverless GraphQL server and functions defined for most of your application query, mutation, and subscription operations. Depending on your setup and needs this can give you many of the benefits of a microservices-style architecture without all the headaches and overhead introduced. You may have different problems (mostly cold starts) but I am a big of it regardless.

To give an example, suppose a client runs a getProfile query. You want some business logic to grab the currently authenticated user’s profile information from the database and return it. You would create a standalone lambda function in whatever language you like that is called when the getProfile query is performed, do your business logic, and return the result. AppSync handles the request/response validation and authentication and dispatch. This function is self-contained, not connected to anything else in your application, which has some consequences:
- You can deploy new versions of this function without changing anything else in your application, if you want.
- You can define scaling limits, memory limits, and timeout for this function, if you want.
- You can define exactly what permissions the function has if you want to, what security groups it’s in, its IAM role. This is the absolute maximum application of the principle of least privilege, if fine-grained security is important for you.
- You can write it in whatever language you want, build it with whatever tooling you want.
- Different teams and projects can manage different subsets of functions, enabling teams to work independently but each be contributing to a unified service.
These are all optional benefits. You can also use a single IAM role and toolchain and language and limits for all functions in your application, but you also have the flexibility to slice up pieces of your services into independent units to avoid a monolith or big ball of mud situation. You can create a “monolith” library of all of your business logic and repositories but package it as separate functions. Again, if you want. You can also create a single resolver function that handles all requests if you prefer simplicity. Or do both!
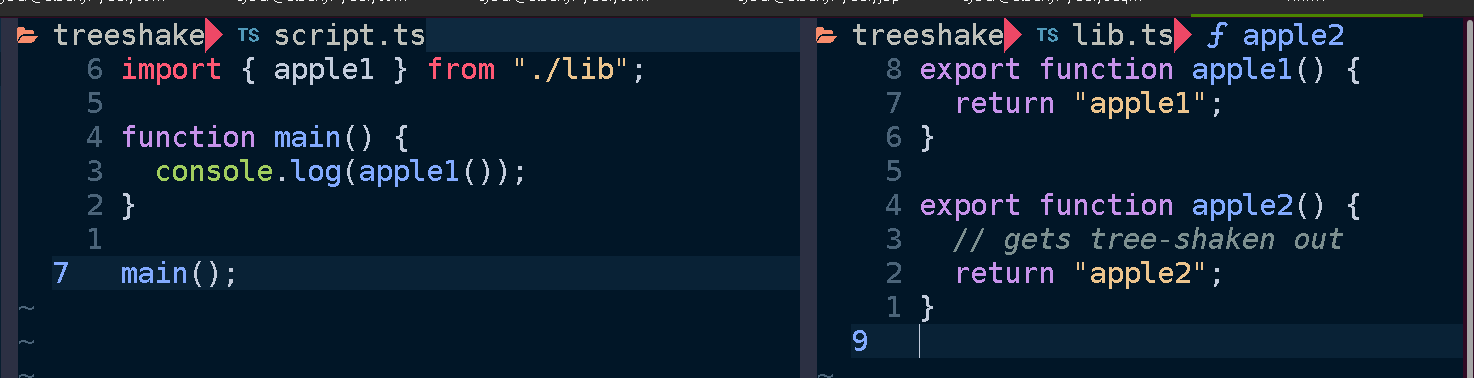
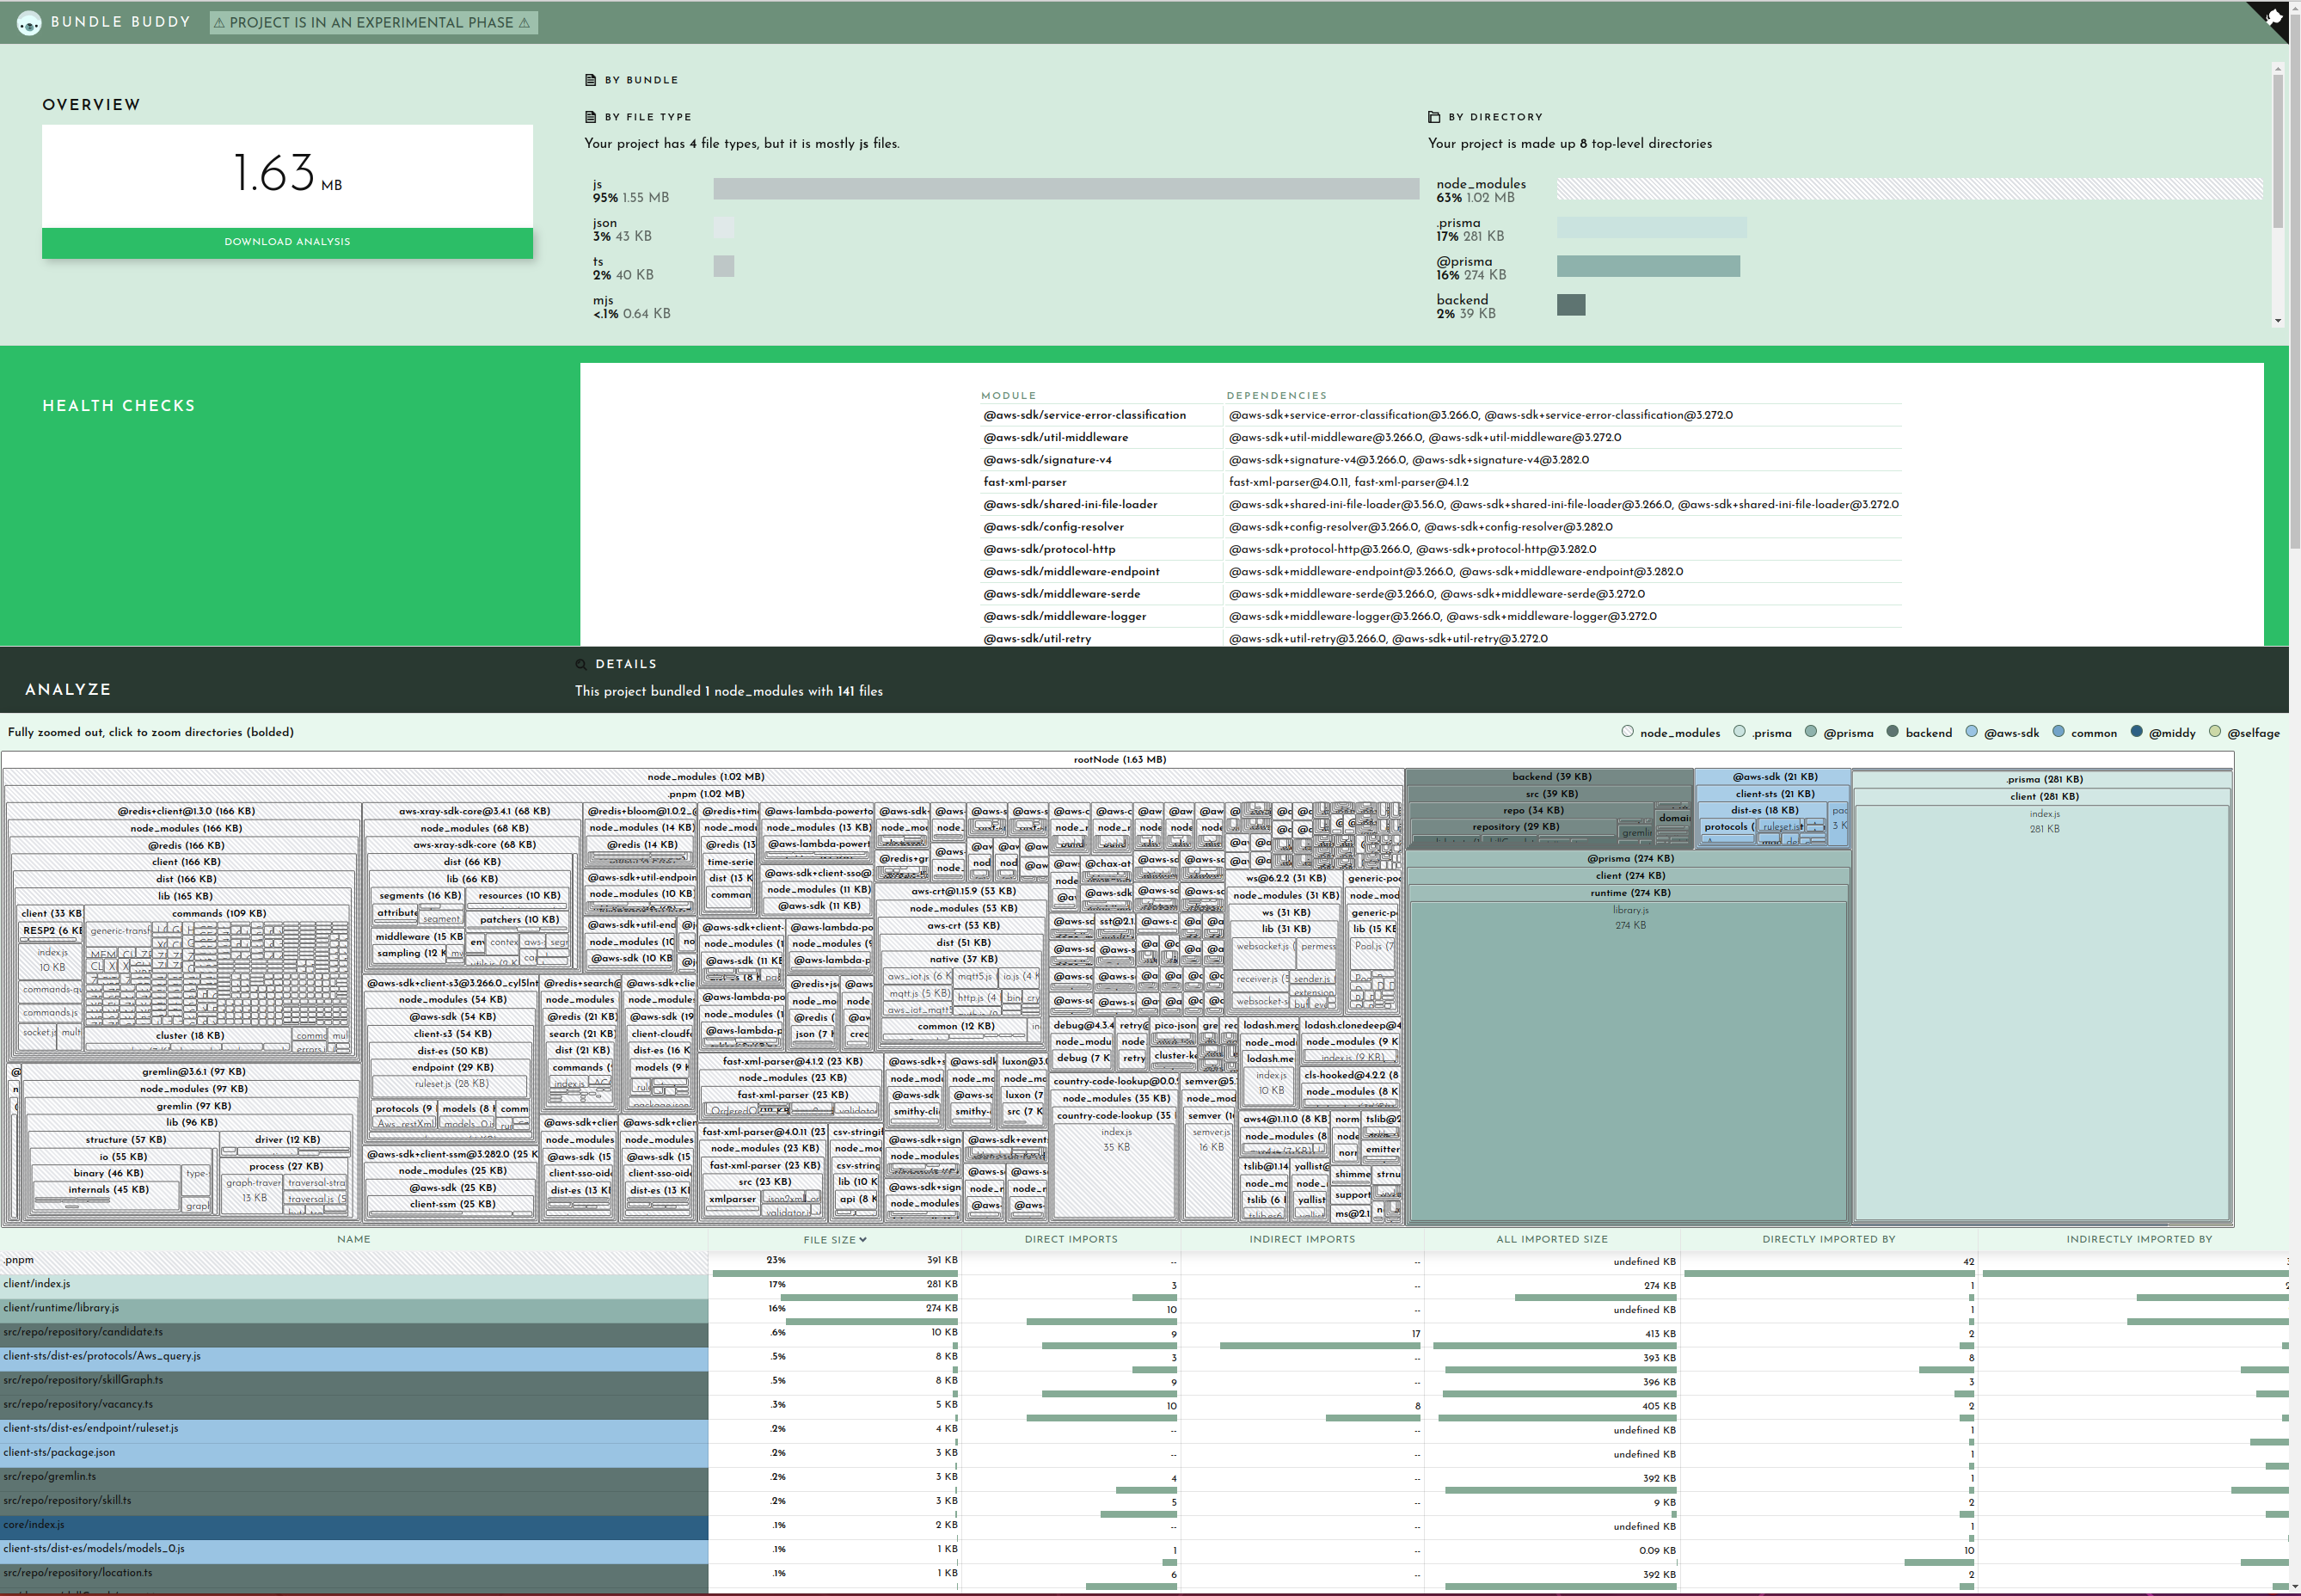
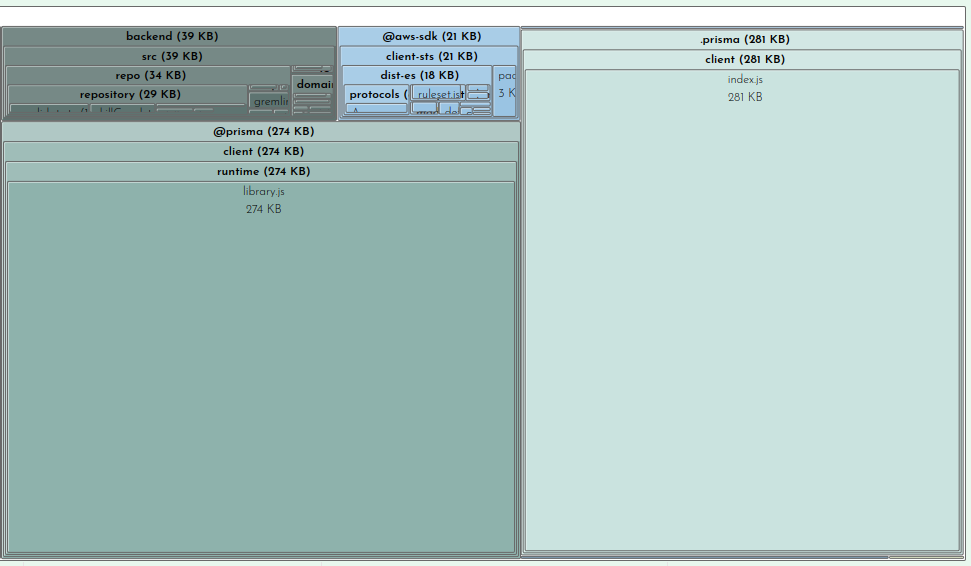
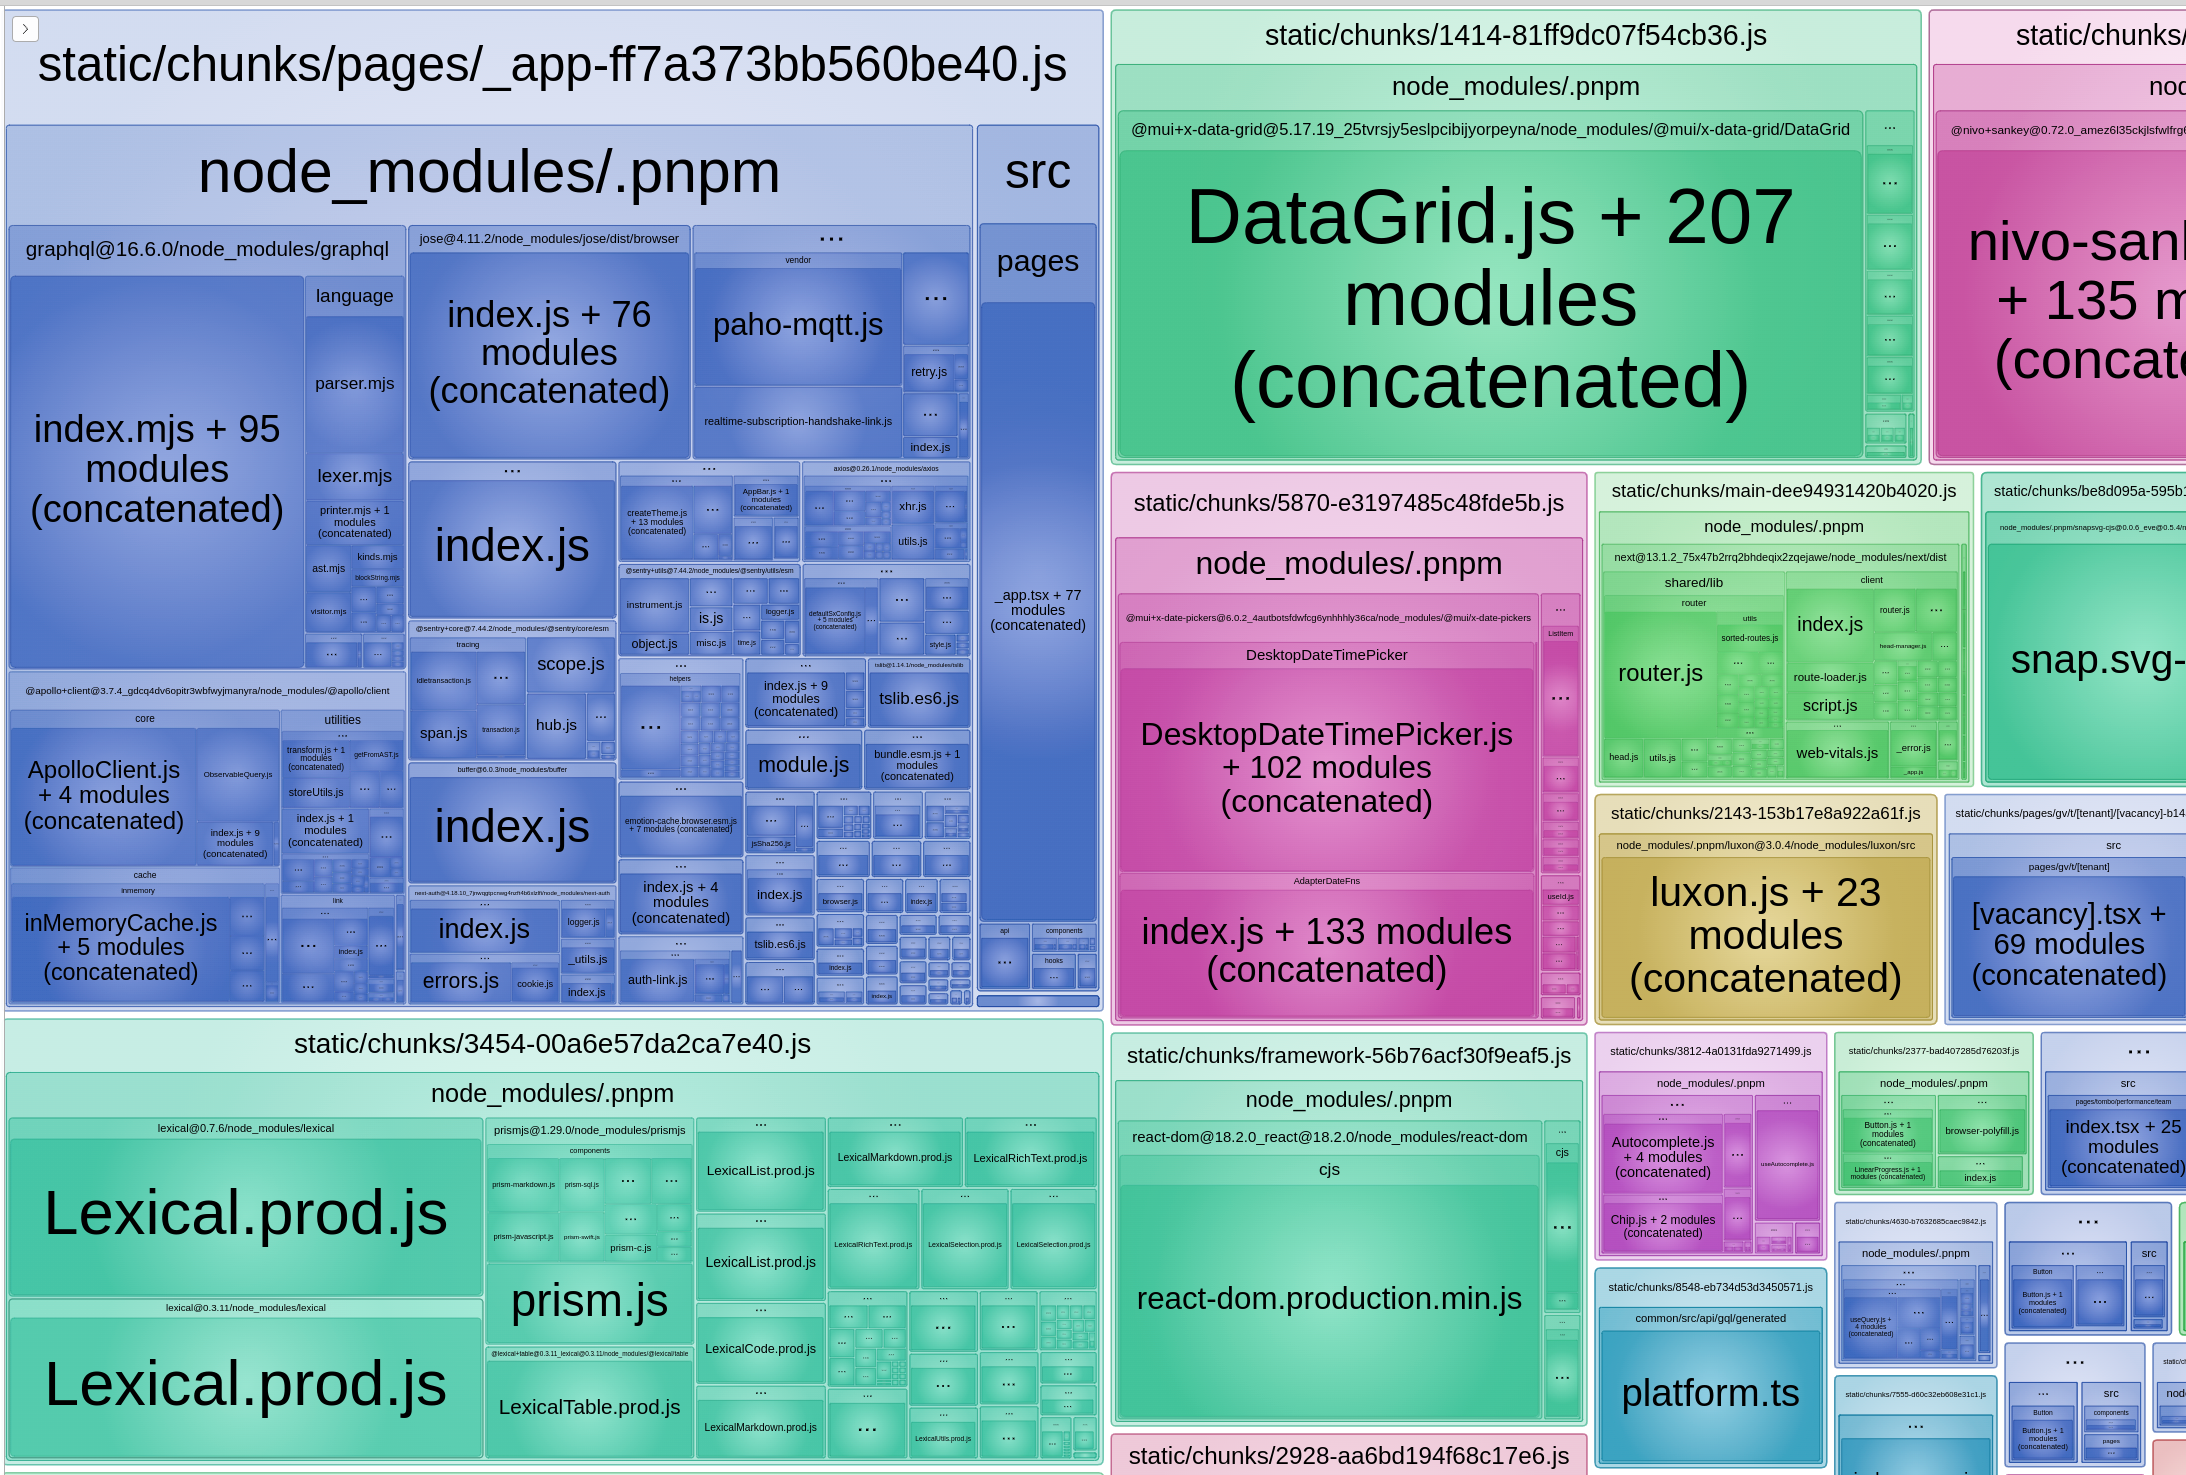
This architecture is most suited to compiled languages (like Rust or Go) or JavaScript/TypeScript because each function should be small and self-contained. This is where JavaScript’s tree-shaking tools really shine. If your function loads some data from the database and imports some functions, that is all of the code that will be in your function. Your codebase may grow but the resolver functions stay the same size. If you want you can have one large monolithic-style library, or a set of libraries, where each resolver function only pulls out the pieces it needs from the library and compiles or bundles it into a small piece of code that is invoked on-demand by your GraphQL server. Basically any language should be fine for this setup unless it’s Python.
In my opinion this is a wonderful modern application of the UNIX tool philosophy: do one thing and do it pretty well. Create small self-contained units that can be assembled by the user to suit their needs.

Another thing AppSync handles for you are subscriptions. These let your client application subscribe to events or data updates in real-time. Setting up and administering your own WebSocket services can be a giant pain in the ass, especially if behind a load balancer. GraphQL and AppSync make this Just Work and Not Your Problem.
My biggest problem with AppSync is that it does not support unauthenticated requests. Any application will have a need for these, for example handling signup or forgot password flows (arguably these can be handled out of the box by Cognito but you will have other needs). So your application may need something like a REST API to fall back on for these types of requests or to use an unauthenticated Cognito identity pool role (cool although a pain to set up). I hope AWS adds a better solution some day.
Just REST With Extra Steps?
Some feedback from my coworkers when building a project making heavy use of GraphQL was “it feels like REST with extra steps.” Which is absolutely true, though the number of extra steps can depend quite a bit on your setup, like if you’re doing code-first or schema-first, need to run a code generation step, and depending on how you consume the API.
Speaking as generally as possible, it’s likely building a REST API will be faster and easier than GraphQL. If these are your priority, you probably want REST. It’s standard, you can build new endpoints quickly without having to define the request and response shapes, polymorphic types are much easier to deal with, you probably don’t need any code generation or extra tooling, and everyone’s familiar with it.
GraphQL will probably be more complex but this complexity pays off depending on your application. Your technical and business requirements are the deciding factor. If end-to-end type safety and validation is important to you, or self-documenting APIs, or real-time subscriptions, or you need to do relational queries via your API, or want client generation for different platforms, GraphQL may save you time and be more maintainable.
If your application isn’t so serious, or is small and unlikely to grow into a large API surface, if it’s just you or a small team, or if your frontend and backend can be tightly coupled, I would probably do a REST API due to its simplicity and low overhead.
GraphQL vs. REST: When to Use Each
When to Use GraphQL
GraphQL is particularly effective in scenarios with:
- Complex Data Requirements: When applications need to retrieve complex, nested data structures in a single request, GraphQL provides a more efficient way to query the exact data required.
- Dynamic Queries: In cases where clients may need to change their data requirements frequently, GraphQL enables clients to request only the fields they need, reducing the payload size and improving performance.
- Multiple Resources: If your application architecture involves multiple resources that often link together, GraphQL allows for a more streamlined approach to fetching related data in a single round trip.
- Real-Time Functionality: Applications that benefit from real-time updates, such as chat applications or live dashboards, can leverage GraphQL’s subscription capabilities for handling real-time data effortlessly.
When to Use REST
If you’re looking for:
- Simplicity and Speed: For simple applications with straightforward API needs, REST provides a quick and easy method to implement CRUD operations with standard HTTP verbs.
- Less Frequent Changes: If your API endpoints and data requirements are stable and unlikely to change frequently, REST’s fixed endpoints reduce complexity and can be more straightforward for consumer integration.
- Well-Defined Resource Models: When your application is built around a clear resource structure that maps directly to HTTP verbs, REST’s resource-oriented approach is a natural fit, making it easy to understand and implement.
- Support for Caching: RESTful services often leverage HTTP caching mechanisms effectively. If caching responses is a key consideration for performance, REST can provide built-in support for caching through standard HTTP headers.
In conclusion, evaluating your application’s specific needs will guide your choice between GraphQL and REST. For complex, dynamic data interactions with a focus on developer flexibility and efficiency, opt for GraphQL. For simpler use cases with stable requirements and resource-oriented designs, REST remains a robust and effective solution.